UMORO Hyper-Light Coat

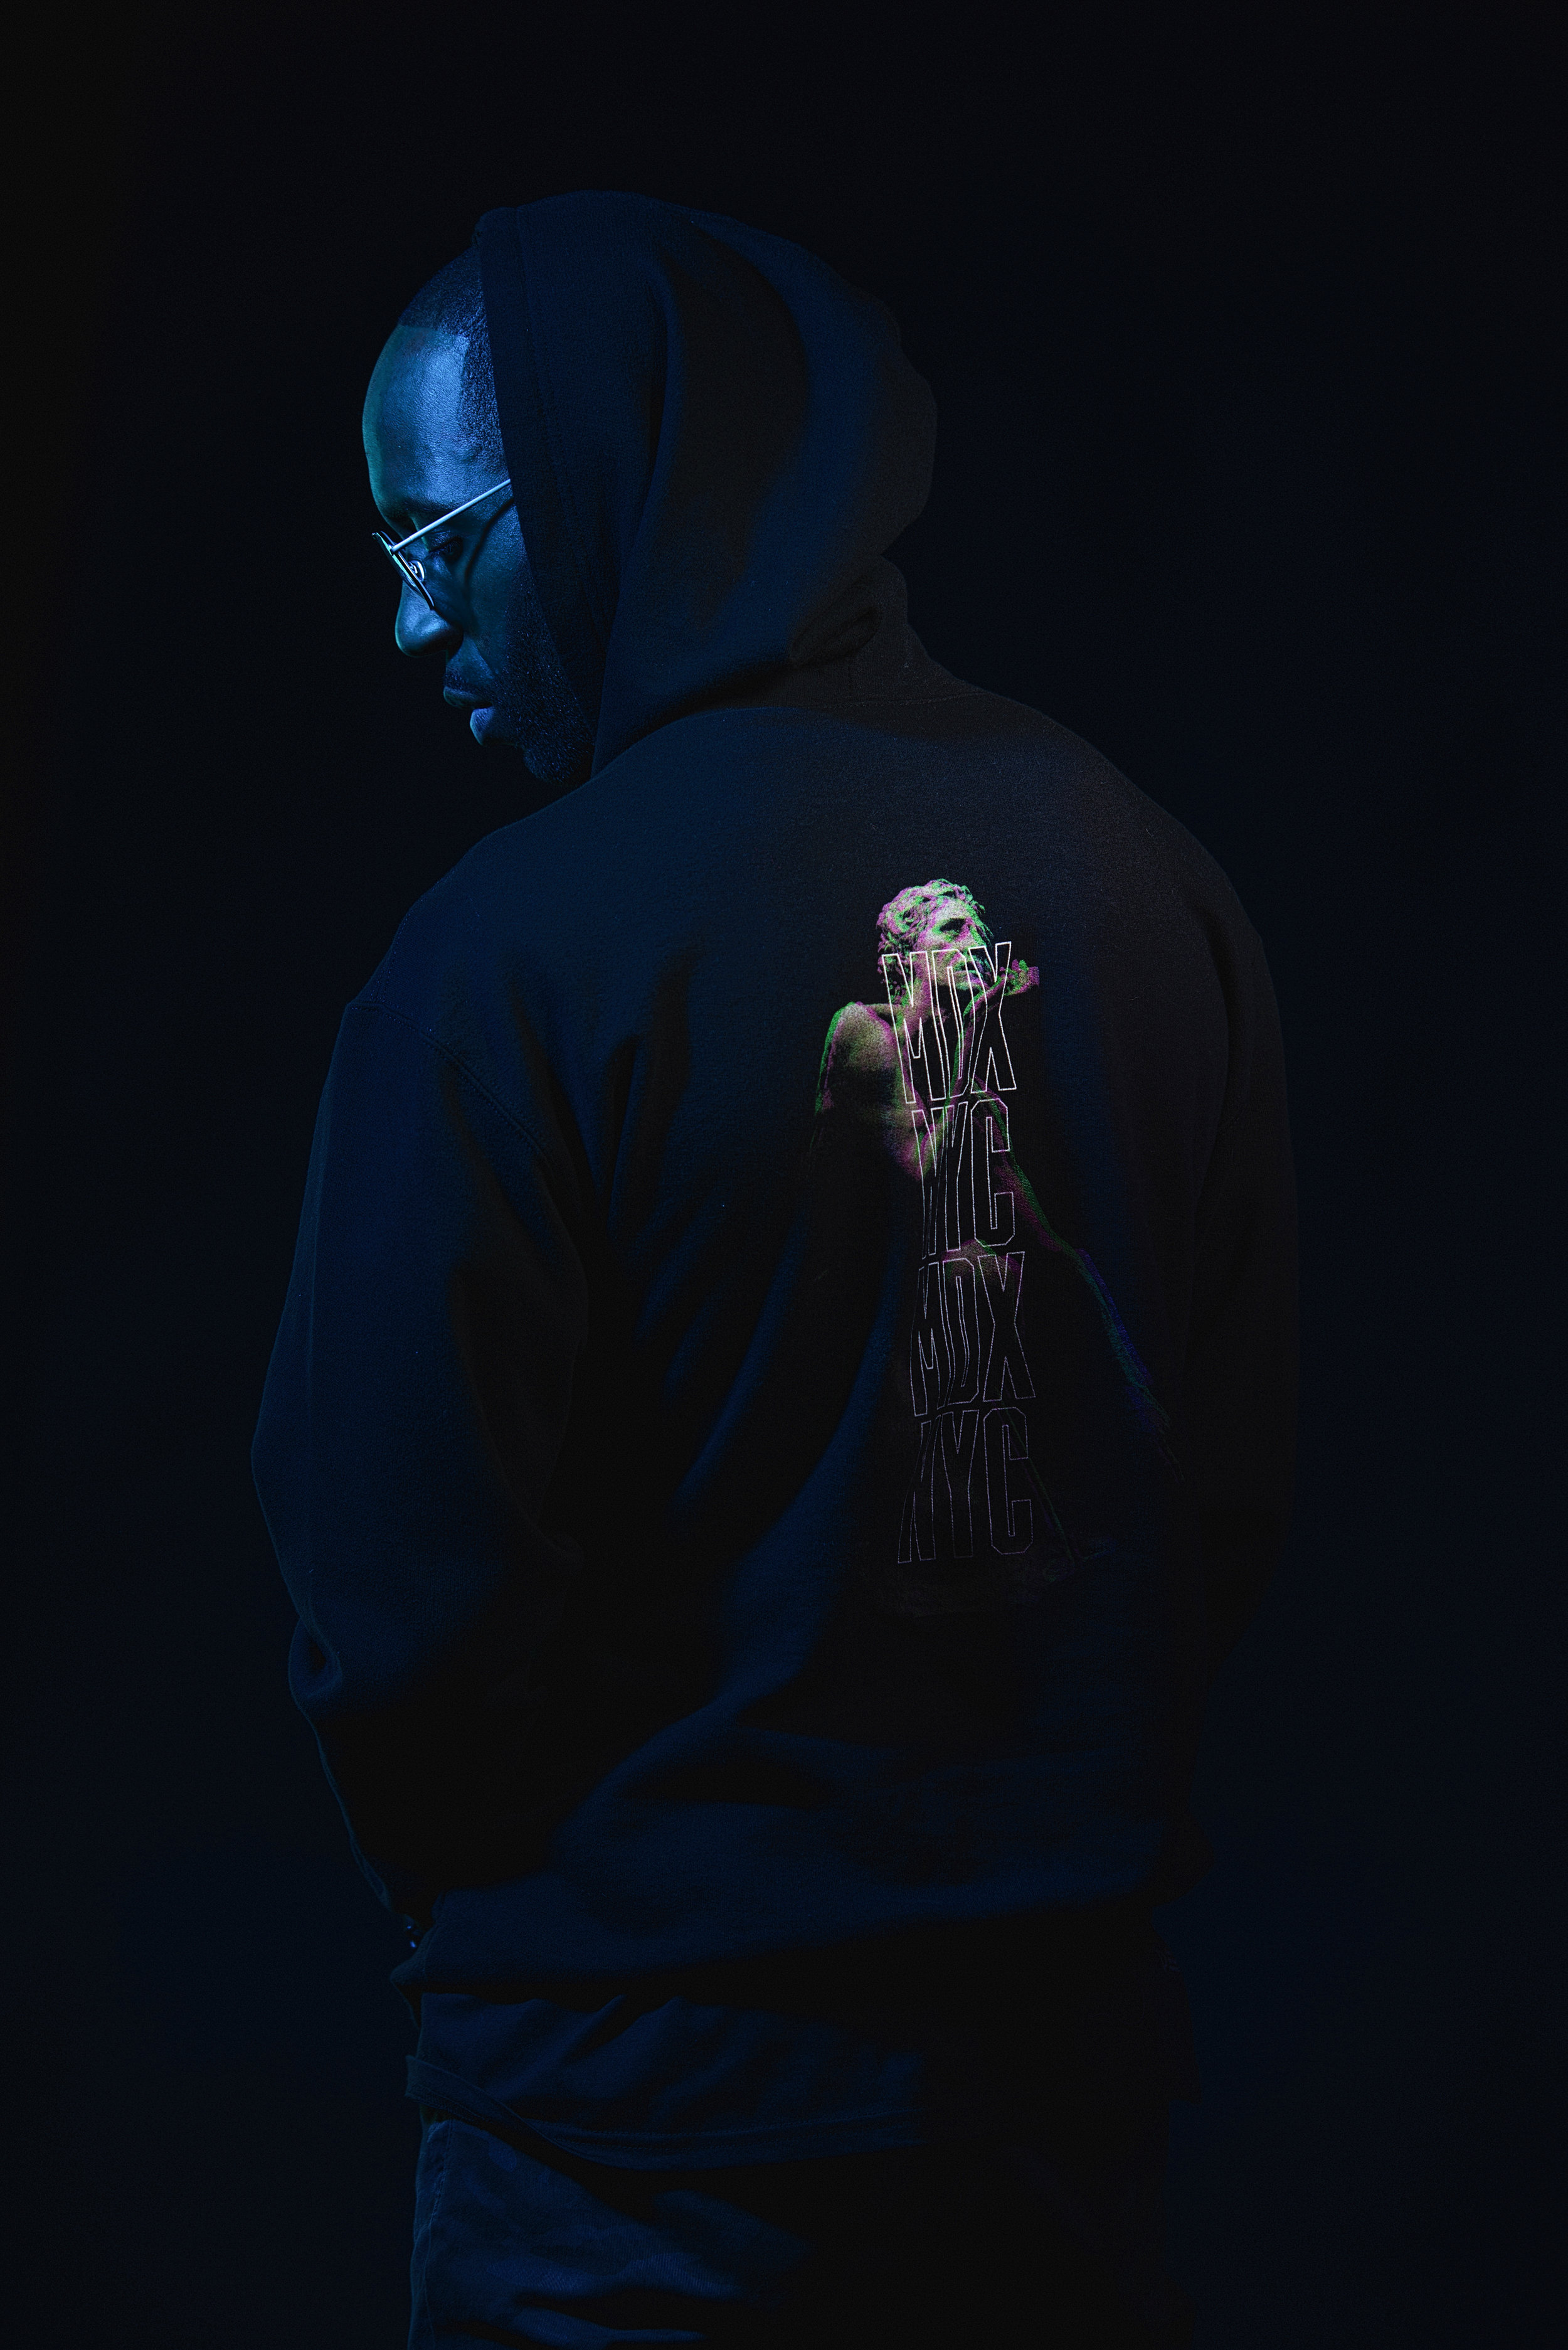
This would be one of the more intricate sets I’ve had a hand in. We built a six piece wall for this set along with added florescent lighting to get the glow behind each staggered wall section. The use of red gels wrapped around the tubes help bring the set together. With Umoro, we shot a product feature video to accompany each jacket color.

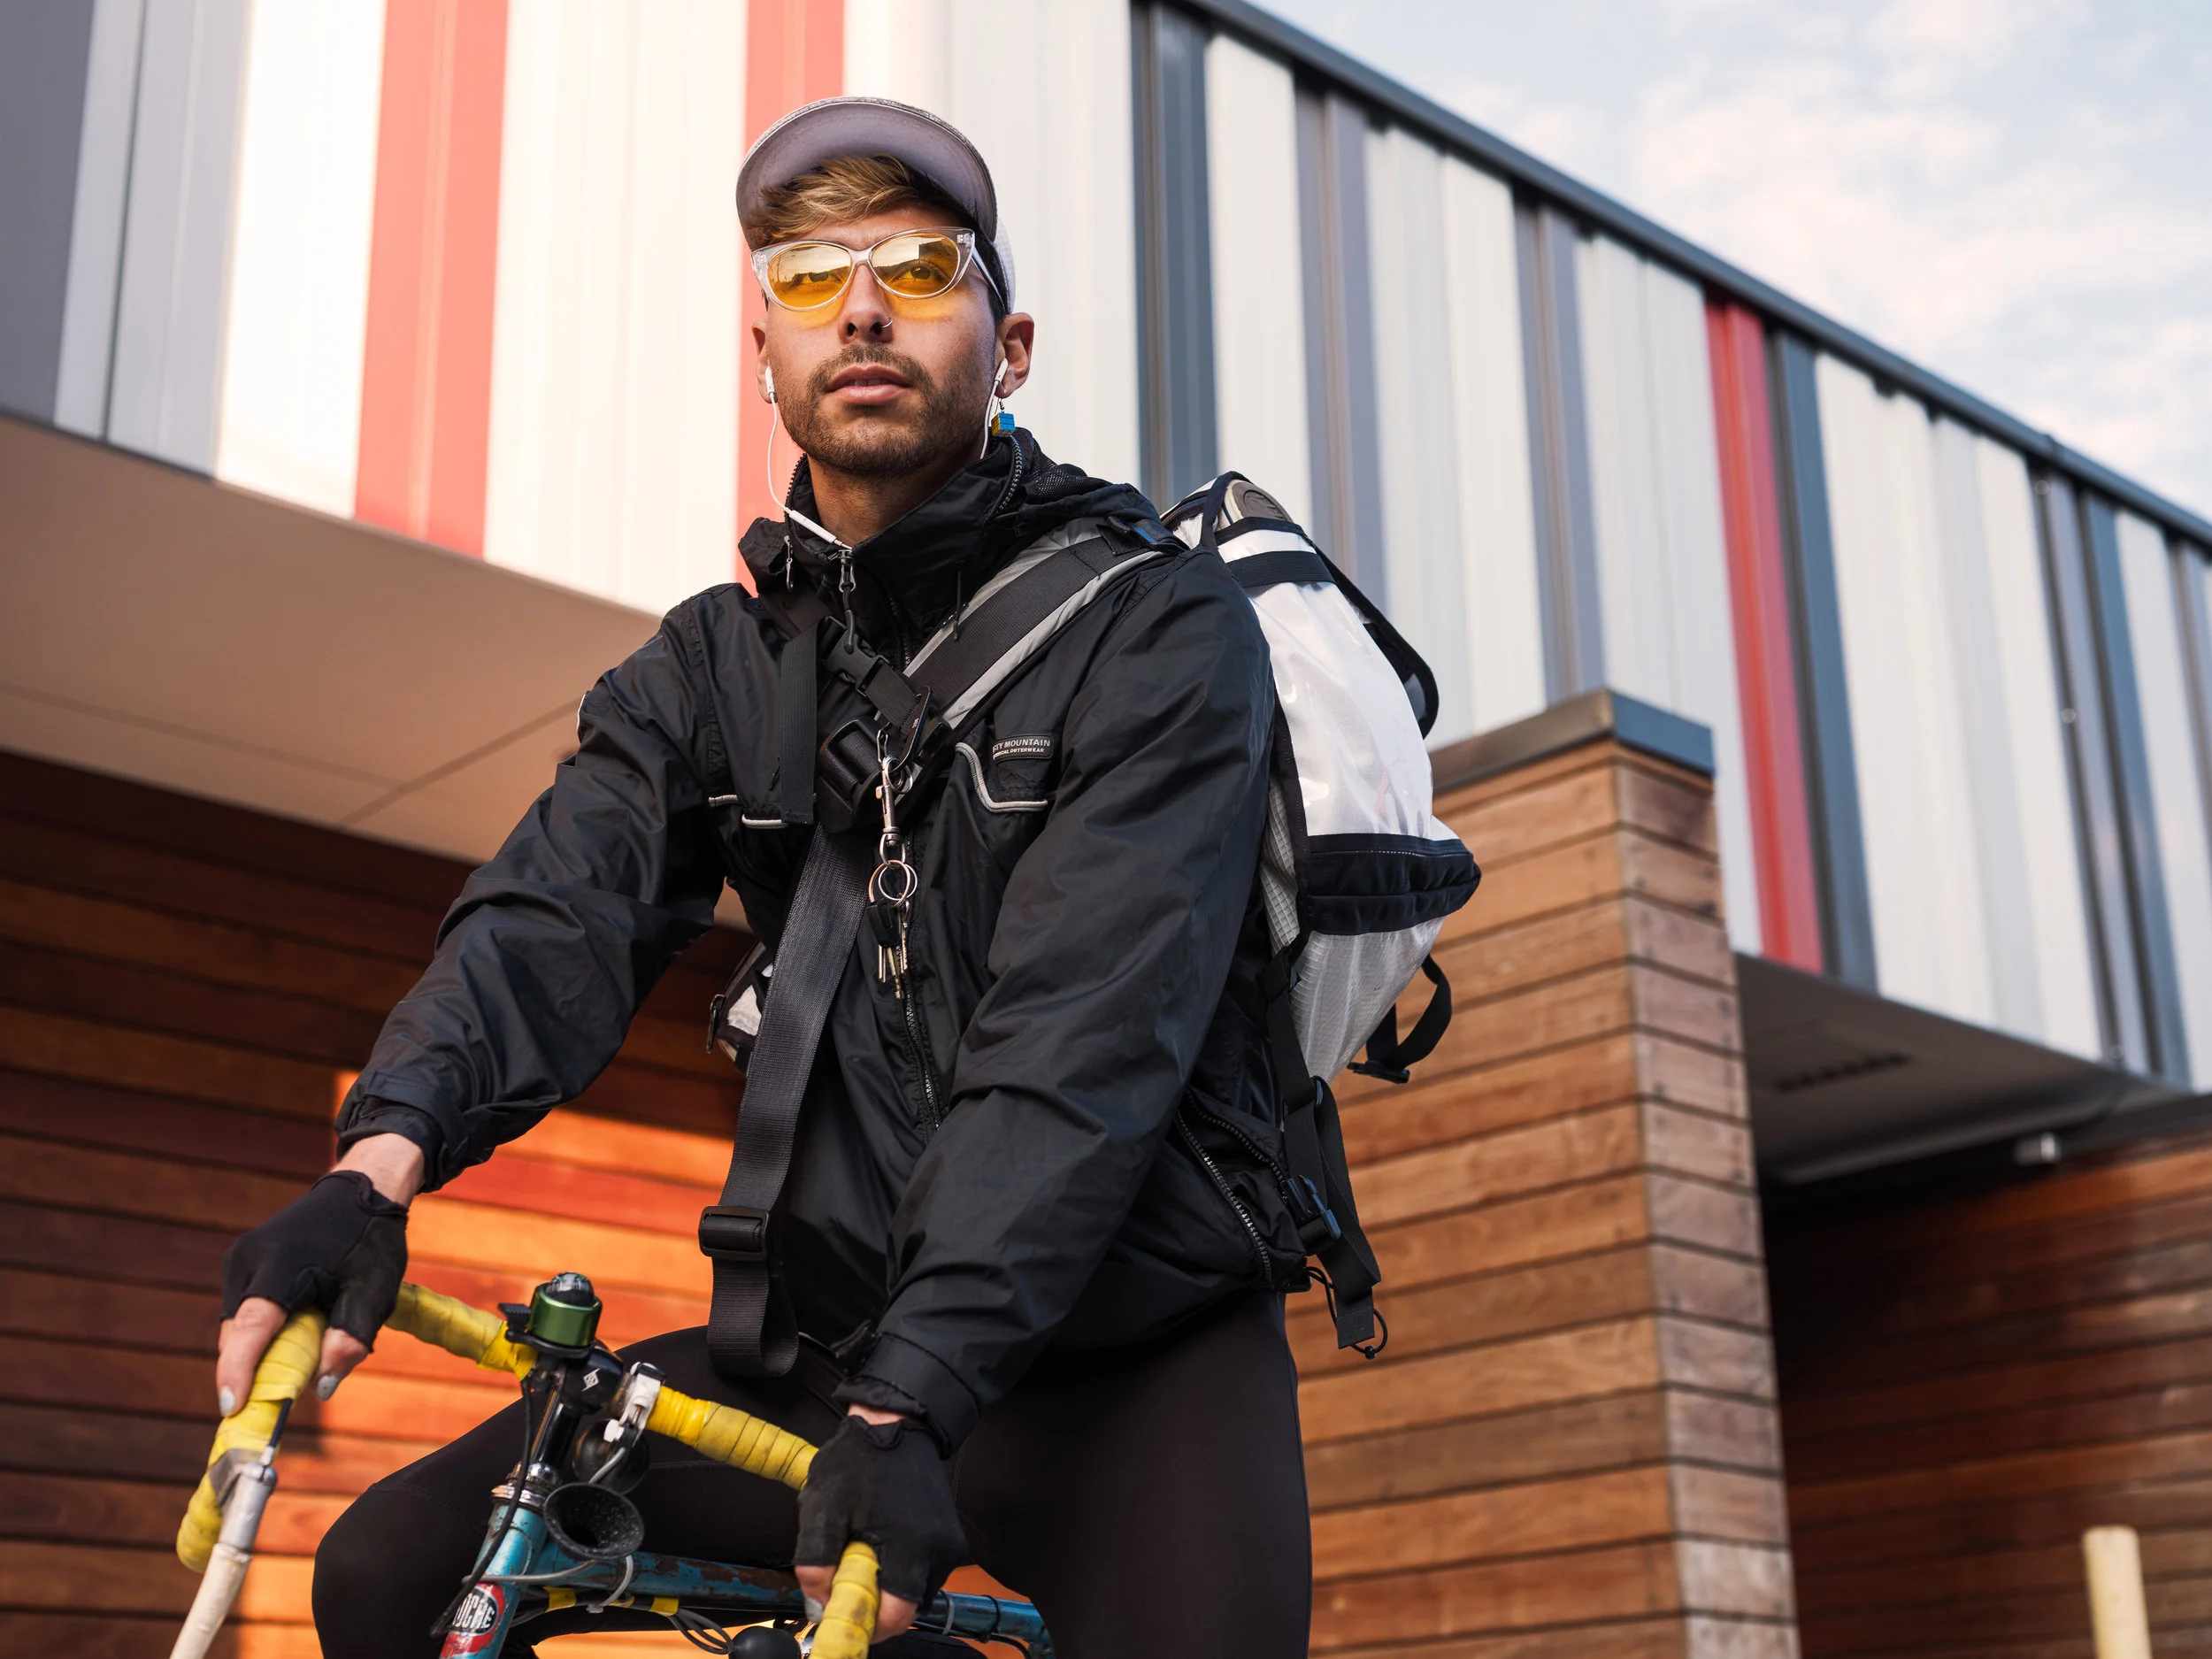
As the video progressed, we went from static poses to more movement. The jacket features an interesting zipper that can be torn apart when removing the jacket. This is shown with progressing shots mixed at various speeds to keep the interest factor up. A mixture of wide and close shots come together to give the viewer a sense of actually holding the jacket..

For all shots, video related the Nikon Z6 was use on a Ronin-S. The Nikon 50 f/1.8 Z was used for all the the shots. The 50mm offers a great middle ground for both wide and tight shots. The sharpness of this lens is unmatched among all the lenses I own. With smooth and fast native autofocus, the need to reshoot the scenes multiple times was not necessary.

Fun Fact: on the first day of this shoot, the power was knocked out by strong winds. We did what we could on battery power, but as the timer estimated we only had 27 minutes to shoot all of 20 shots we had planned. There was no way that was going to happen and in the end, we scrapped all the shots. This time, we had all the power we needed and with some help in editing, I am impressed with one of the first extended productions of a product launch video.

The Grand Canyon & Death Valley

In a joint venture with a great cinematographer, we have decided to step our game up when it comes to couple shoots. If we are going to photograph peoples union, it will have to be epic. We both our our heart and soul into other areas of our careers, so why not here. We decided to head to Las Vegas and make the most of the surrounding areas. I hope to provide a commercial feel to this genre.

3-Image stitch from the Fujifilm GFX50S.

3-Image stitch from the Fujifilm GFX50S.

Horseshoe Bend was absolutely stunning when we walked up to it. Mind you, it is a 20-30minute hike in through rock and sand with gear. I am absolutely grateful for LED panels for this reason. As much as I would have loved to use the Profoto B1 here, it would have cause more issues than solve them. With the soft light produced during a cloudy sunset, throwing hard light can be difficult. Check the behind the scenes shot below. I am always grateful to any helping hand when it comes to nailing the shot. Over the years, I’ve learnt that a group effort make a better end product.

It’s a group effort.

It’s a group effort.

Death Valley was next on the list. In hind sight, staying in Las Vegas is not the best idea if you plan on driving hours outside of the city for the natural wonders. Once you arrive, every minutes spent in the car is absolutely worth it. The mountains are one thing, but the scale of it all is what’s amazing to see and work with. During our time here, we tackled the Sand Dunes and Salt Flats within the park.

Blowing sand was a serious issue. I would recommend not to making lens changes.

Blowing sand was a serious issue. I would recommend not to making lens changes.

Stepping way back gives you a grand perspective.

Stepping way back gives you a grand perspective.

3-Image stitch from the Fujifilm GFX50S.

3-Image stitch from the Fujifilm GFX50S.

Missing the sunset is a real concern for us. On the way to this location, I’m sure we set a new land speed record in the Kia we rented. The Salt Flats here in Death Valley is vast and finding the right spot is tough. Luckily, we spotted an off-road path that brought us even closer. 

Dusk and dawn offer beautiful light and colours in the sky. Initially, we shot in the opposite direction, until we turned around and saw the amazing colours produced in the clouds behind us. We instantly changed direction. 

Stepping into Video

It seems like a natural step forward coming from photography. Taking this leap isn’t the easiest thing I’ve done, but it is a welcomed challenge. Going back to the learning phase is scary and exciting at the same time with so many more preparation steps to make sure nothing is missed. I don’t want to say photography is easy, but video takes a lot more consideration to make sure all is set for a shoot day.

Falling back on what I’ve done in the past when starting out in photography, I have gravitated towards books. There’s plenty of knowledge out there when you feel confused or unsure about what you are doing. I am a strong believer in practice. I’m all for jumping into the deep end, making mistakes and growing from it .

Photographing Penny Oleksiak for Asics

One of the best aspects of this job is working with inspirational people. This ranges from the talent to the team. I was asked to shoot the “I Move Me” campaign for ASICS. We would be photographing a range of athletes that included Penny Oleksiak, a gold medalist swimmer.

Fujifilm GFX 50S + 63mm f/1.8

Fujifilm GFX 50S + 63mm f/1.8

This shoot was strict with time. Adding to the stress, my time with Penny would be shared with an on going video shoot. In some way, most shoots some down to working quickly and creatively. To make the most of my time with Penny, scouting ahead and doing mental gymnastics as to how to shoot, using what light was continuous.

Fujifilm GFX 50S + 63mm f/1.8

Fujifilm GFX 50S + 63mm f/1.8

The image above is shot in an impromptu locker room. The lockers were moved into a corner and a bench placed to create the scene. Following the video team, we quickly set lights in place. Using complimentary colors to gel the light, we managed to nail a shot. Working quickly is one thing, taking a chance with color is another. Pushing yourself to do something different is always rewarding.

Fujifilm GFX 50S + 63mm f/1.8

Fujifilm GFX 50S + 63mm f/1.8

This is the last shot in the facility. The video team arranged for lights on the turf so basically the back lights were provided. With the addition of a gridded beauty dish boomed from above, we were good to go. One problem, I forgot to remove the orange gel from the light, so the original file was far from what I envisioned. My only excuse was the time frame I had to shoot so I kept shooting. With adjustments in Lightroom and Photoshop, I was able to balance the colors to the vision I had for this image. It would of been easier and less time consuming had I fixed it during the shoot.

Fujifilm GFX 50s + 110mm f/2.0

Fujifilm GFX 50s + 110mm f/2.0

The last location was an Olympic sized pool. When working around water, all extra precautions are taken. I opted for the battery powered Profoto B1s over the plug in D1s. With linked arms to a PA, I leaned over the pool to get the GFX 50s and 110mm lens inches from the water to create more drama. With the camera so low, the reflection in the water was exactly what I wanted. Well worth the risk.

Looking back on this shoot day, I remember how tired I was. Having to constantly be thinking of the next step requires a lot of brain power. Regardless, work is work and taking the oppertunity to both push your limits and try new techniques is always rewarding. The harder you push on the current shoot, the more doors will unlock in the future.

Shooting the Mirrorless Z6 in -26˚C

More often than not, when looking at an image, I take into consideration the conditions the image was created in. Funnily, it only occurs to me when I’m working in the extremes, either stiflingly hot and humid or the sub-zero temperatures. When I find myself in these environments, it’s important to work both quickly and with purpose. 

Nikon Z6 + NIKKOR Z 50mm f/1.8 S

Nikon Z6 + NIKKOR Z 50mm f/1.8 S

Having a plan really comes in handy when working in the cold. As much as I would love to ponder a location, the truth is that your hands are freezing along with your ears. If you are experiencing this discomfort, so is your talent. Find the location, your angle and nail the exposure. Moving to the new Nikon Z6 has really helped propel my workflow. Since using my Fujifilm GFX50 S, I have fallen for mirrorless cameras hard.

Nikon Z6 + NIKKOR Z 50mm f/1.8 S

Nikon Z6 + NIKKOR Z 50mm f/1.8 S

When it comes to mirrorless cameras, what you see is what you get. By not looking at a mirror, you see the limitation of what the camera can capture. From there you can begin to compromise and find the exposure that you truly want. Not having your eye trapped in a viewfinder is another perk. Being able to shoot from low angles without having to lay on the ground because of the flip out screen has saved me a lot of laundry detergent. Now, I can finally explore new perspectives without having to deal with 110MB files. 

Nikon Z6 + NIKKOR Z 50mm f/1.8 S

Nikon Z6 + NIKKOR Z 50mm f/1.8 S

In the end, a camera is just a tool and being a photographer goes way beyond what camera you use. The Nikon Z6 is a welcomed change, it’s now easier to get the same shot I would attempt with my DSLR. When it comes to ergonomics and flexibly, the mirrorless beats out any reflex camera. Not only can you explore more viewpoints, but it can be quickly before your talent gets frost bite. 

Nikon Z6 + NIKKOR Z 50mm f/1.8 S

Nikon Z6 + NIKKOR Z 50mm f/1.8 S

Nikon Z6 + NIKKOR Z 50mm f/1.8 S

Nikon Z6 + NIKKOR Z 50mm f/1.8 S

Images shot for www.umoro.com


Value Village + Rethink Reuse

We were commissioned to cover the creation of an art installation for Value Village. The art installation would be set up in Graffiti Alley in downtown Toronto over the course of a day. We were asked to shoot as the project unfolded with uploads periodically sent over for use on social media. Our challenges on this gig would be both logistics and the ability to shoot in a small area for two days, while capturing a fresh perspective each time.

value Village rethink reuse toronto art.png

The point of the installation is to raise awareness of the amount of water wasted for the production of new clothing. I am all for reusable and renewable products. It was amazing to see the piece come together over the 8 hours. It was cold and wet, and when the sun finally made its way into the alley, all of us, both video, sound, and photo, did out best to soak up some vitamin D.

value Village rethink reuse toronto art.png

We worked with an amazing team that catered to the content that was needed. It’s a wonderful feeling to see our work be posted as you shot both on social media and the website. I am not completely sure where else the images went, but when work is showcased, nothing else brings me more satisfaction. Back when I started, I just wanted my work to be part of something bigger. Working closely with Kae, we were able to edit and send images for use almost immediately. As time passes, you learn that you can’t do it alone, it takes a team. More perspectives honestly produces better work.

value Village rethink reuse toronto art instagram.png

Look Organic: Cosmetic Campaign

The most rewarding projects are definitely the ones where you are part of the planning and execution. Mind you, this project might of been on the rougher side, but never the less, there was art direction and a plan to build a powerful site for the launch. Check out Look Organics.

DSC_0870.jpg

The premise of the brand is hydration and using the least amount of ingredients possible. We ran with the hydration part of the brand here. It’s amazing what a borrowed fish tank, carbonated water and some lightings can do.

gfx50s_cosmetics_handmodel_lookorganics.jpg

Last but not least, the product shots. All products are shot one by one in studio. A series of light shaping tools and bounce cards help control unwanted reflection and reflect light to fill shadows as needed. My biggest tip fo shooting products is to have patience and take the time when creating the photo to fix lighting problems. You will be glad once you get into photoshop.

Look product photography_gfx50s.jpg

Multiple Exposures - ACP Customs

One of the first realizations when it comes to lighting cars and motorcycles is size. These subjects are way larger than a person. The only way to combat this issue is either to use many lights or the much cheaper way, light painting. Combining multiple exposures really helps create a more balanced photo. 

ducatiacpgfx50s.jpg

Making sure everything is placed the way you like it by taking the time to compose the shot. Cementing that tripod in place is key. Slight shifts of the camera, even when hitting the shutter button can spell hell later in Photoshop. Having to alight and free transform until everything lines up can be tough. Prevent this issue by using a remote trigger. 

Once you are happy with your composition, leave everything as is. When it comes to workflow, thinking ahead will save you a ton of time.  As I lite the bike by section, I was mindful of the key light position. Lighting the bike completely would result in a flat image. 

Fujifilm GFX50s + GF 63mm f/2.8 merged Pano

Fujifilm GFX50s + GF 63mm f/2.8 merged Pano

In post-production, the best thing about having multiple layers is the control. You now have full control over how bright any section of the bike can be. Fully lighting the bike wouldn't be as interesting, but this is subjective. The first image consists of about 6 images combined together. It's a fun test of my computer power, where 6 images stacked is a whopping 660MB o,r a whole bootleg movie from Kazaa. And that's just the working files. In the end, the extra effort placed on lighting and combining allows you to create a tailored image. 

Basketball Under a Freeway

It will always be a compromise, use a DSLR for the autofocus and speed or go for the medium format and get more detail, colors and depth. When it comes to speed, nothing beats a DSLR, the autofocus is lightning fast but, it falls short with it comes to color and dynamic range. I chose the Fujifilm GFX 50s for this shoot. When it came to action, we had to redo it multiple times, but when you grab that shot, it's all worth it. 

Fujifilm GFX 50s + 63mm - f/3.6 @ 1/100th/sec

Fujifilm GFX 50s + 63mm - f/3.6 @ 1/100th/sec

For this shoot, I chose two Profoto B1s with midi octabank from Elinchrom and Profoto Zoom Reflector. We were shooting around 11:30 AM on a sunny day, but since the location is under a freeway, it was completely shaded. The light on the side acted as a natural rim light. The octabank was the key light for this shoot. A bit of flash goes a long way when it comes to separating your subject from the background. In the image above, there are two flashes, one camera left with the zoom reflector at its' lowest power and another in the octa camera right. Adding @drkev_hybrid in the foreground camera right really helps build a scene as well. Having someone playing basketball with a friend is more powerful in this context. This is my personal feeling, Kev did not object. 

Fujifilm GFX 50s + 63mm - f/2.8 @ 1/125th/sec

Fujifilm GFX 50s + 63mm - f/2.8 @ 1/125th/sec

This shot took multiple tries. Moving onto an EVF (electronic viewfinder) has its pros and cons. A DSLR is a real-time image produced by a mirror, an EVF is a screen and when you consider all the processes needed to create that image, there are some delays. I am sure with practice it will become easier, but for now, it is still a little challenging to nail shots like these. Since I am using flash without the Profoto TTL remote, I am trapped at 1/125th/sec which isn't the best for freezing action unless you press that shutter at the moment of inertia. It took a couple tries and a missed shutter clicks on my end, but in the end, we came away with one useable shot. 

The lighting set-up for this shot is a little different. Adding more rim light wouldn't benefit this scene, there was plenty to be had from the sun. Instead, I opted to bounce light off the ceiling with a Profoto B1 with the Zoom Reflector. This helped reduce the exposure and retain some of the detail outside the underpass. Flash also aids in freezing action, something I needed desperately. There is an octabank camera left as well to help separate the shooter.  

Fujifilm GFX 50s + 63mm - f/2.8 @ 1/125th/sec

Fujifilm GFX 50s + 63mm - f/2.8 @ 1/125th/sec

If you can pose a shot, go for it. I start with the actual action and go from there. Considering that medium format cameras are slow, it's a must. Trying to capture this at its actual speed is nearly impossible or would take much longer. I am sure if you look, you can tell my light set up for this one pretty easily. Octabank camera left and the ceiling is a dead give away for the second light. If I could go back, I would have turned the power of the flash located camera right down just a tad.

These images were created for Myodetox. There was a book published and printed that I am waiting to get my hands on. Once I get it, I will update this post with some tear sheets of the design work. There are a couple of IG stories from the event I saw, it looks amazing. Seeing my work printed is why I do this. On to the BTS. 

iPhone X

iPhone X

The Jungles of Toronto and a Loading Dock

Deep in the jungles of Toronto, we shot for Umoro's new line of camp joggers. On this excursion, I brought the Fujifilm GFX 50s with the 63mm and 110mm. In all honesty, all I used was the 63mm. Wide angles seem to suit my style of shooting. As always, I push for sunset because a directional light is way more flattering to work with. On this shoot, @jaylee.tv will be modeling the jogger. I always find it extraordinary how you can see the same location in many different ways along with exploring a new one. We went to the valley and followed the paths carved out by stoners. 

fujifilmgfx50s,63mm.jpg
forest camo product.jpg
came tech wear umoro.jpg

Remember, Tell a Story

After some coaching from a close friend, he reminded me that I need to continue to push my creativity. Being able to tell as story through our photos will always be more powerful. I was finding it tough finding a way to shoot cars in an interesting way. Car photography is a whole other animal. Composition is always important, but with such large subjects and even a larger environment.

With ample research, you can tell strong automotive photography has a story to tell. The environment plays a big roll. The more simple, the better, as that it doesn't detract from the car itself. These shots were taken in a mall parking structure one hour after it closed. Security wasn't an issue, even though they did question us being there. He just said make it quick and he never came back. 

Lighting for the shots involved bouncing light off the ceiling and floor to get highlights and help kill reflections. Since cars are huge, these shots are comprised of up to 8 shots. The results are well worth the effort. Let me know if you can figure out the proposed based on these iconic automobiles. 

IG: @don_wolf
IG: @terryeas

IG: @terryeas

bmw7mbsclassgfx50s.jpg

Copy of Quick Profile: Scott

Sometimes you meet someone who takes your interest completely. Over the years, I have learned to listen and put my views on reserve while taking in another prospective. Scott is one of these people. He explained his work, and how me makes a statement everyday as he meets numerous people. It was sunset, so I asked if he could give me some time to photograph him. 

gfx50s.jpg
gfx50s.jpg
gfx50s.jpg
gfx50s.jpg

Street Photography with the Fujifilm GFX 50s

It has been a long time since scheduling off an afternoon to wonder the street. Street photography was the tool I used to get familiar with new gear and techniques. This time, it was gear, the Fujifilm GFX 50s. The camera is particularly slow and out of its element for quick focus acquisition, but once you figure out that it's you who must slow down, each shot composed is almost a masterpiece. Taking the time to stop and figure out why this scene caught your eye is what street photography is about. This time, with the GFX 50s, there is no fear of blown out highlights or lost shadows. Going medium format is freedom. 

gfx50s fujifilm street photography toronto.jpg
gfx50s fujifilm street photography toronto ago.jpg

First day with the Fujifilm GFX 50s

Have you ever bought something, and not have buyers remorse? I have found the one thing, the Fujifilm GFX 50s. From the moment you take your first photo, you will be smiling inside and out. It only gets better once you get these photos into post-production. The detail and flexibility just open the doors. You will never see a highlight and shadow recovery slider work so well. I had no shoot planned for today, but I grabbed @vinnierehab and shot a few by the back of the lab. I for one welcome the decreased speed of shoots. Quality over quantity always. 

Equipment used: Fujifilm GFX 50s + Fujifilm GF 63mm

fujifilm gfx 50s 63mm_-3.jpg
fujifilm gfx 50s 63mm.jpg
fujifilm gfx 50s 63mm_-4.jpg
IG: @joe_umoro

IG: @joe_umoro

fujifilm gfx 50s 63mm.JPG
fujifilm gfx 50s aga 63mm.JPG
gfx50s image sample.jpg
gfx50s fuji sample image.jpg

Product Work

Shooting products are honestly one of harder subjects to shoot. Once you decide on the background and the base, it honestly becomes a game of inches with lighting. I usually tend to work with large modifiers that produce soft light, but when it comes to product, the opposite is needed. Hard light tends to produce the best gradients. To achieve gradients, grids are needed.  Almost all lights used were grided. A tight grid was used to highlight the company name on the lid. I cannot stress the importance of using a modeling light, its the only ay to see what you will if you are placing the light

umoro_myodetox_shaker_umoroone.jpg
set up bottle.JPG

Experimenting with Color

Working with gels can be as fun as it can be frustrating. Usually, when choosing colors the colors, I refer to a color wheel or mix colors which are similar. For this collection of photos, the use of grids is a must. The grids help restrict the spread of light, allowing the colors to be separate. As soon as the weahter lightens up, the gels will be used on location.

Myodetox + Nike

When it comes to last minute shoots and tight deadlines, I usually get booked. All Mike had to say was its a collab with Nike and I'm all for it. Since we had minimal time, we shot at one of Myodetox's clinics. When it comes to shooting in small spaces, light leaks and spill pose their challenges. Everything that can be gridded was. Light spilling onto the background would highlight all the unevenness and take away from the dramatic feel we were chasing. 

IG: @alya_myshka

IG: @alya_myshka

One of the major differences between this shoot and others was the amount of pre-planning. We had Mike buy outfits. All the shoes were brand new and color matching came into scope for every outfit. The effort pays off ten fold. I am a big believer in having people play to their strengths. 

IG: @k8beast

IG: @k8beast

The end final medium for these photos was print. A booklet that would be handed out before a run in Miami, filled with stretches that would help participants minimize injury. Because it would be print, colors needed to be on point. The use of a ColorChecker Passport was a must. 

IG: @drkev_hybrid

IG: @drkev_hybrid

IMG_0083.JPG

Thanks for looking. Now to see calculate when I can go medium format. 

Short & Cold Street Shoot

Finding time to go out and explore is a top priority this year. There is no better way to test your skills and limits in photography. Street photography happened more often when I first started out. It offered the most challenges when hunting for good light. If you wanted even more of a challenge, go out at night. Dressing for the weather is top priorty when going out in the winter, something we failed to do because we did not factor in the chilling wind. Enjoy the few photos we captured in Nathan Phillip Square. 

IG: iam_karbon

IG: iam_karbon

torontostreetphotography
_DSC8009.jpg

Product Creatives on White

Shooting products on white is a request that comes up all the time. It's funny how it seems like one of the more basic shoots but can be so complicated once you choose to refine it. As with many things, there are rules to ensure you get the cleanest photo possible.

umoro jacket


Space is an important factor when it comes to shooting products and people on white. The distance between the background and subject is important to preserve edges. Lighting the background is also important where shooting on a white backdrop is not enough. The power setting you choose for the background should not be too much. When lighting the background, I choose a power setting that blows out the background just around the subject. If the other areas are not completely white, I will push them up in photoshop. Another important factor is to have crisp edges to make selections much easier in photoshop. To achieve this, I use f/9 or above if possible. 

DSC_7581-1.jpg

Image review on the back of your camera is good, but there are settings to help you achieve the wanted effect. I recommend turning on highlight warning. The areas that are completely blown out will flash black and white. This will let you know if your exposure settings are correct. The last thing you want is your subject to be overexposed. Apart from losing detail, it would certainly make your life harder during the editing process. 

its

Enough of the technical side. Since this was a rain jacket with a hydrophobic coating, why not make it wet. With the help of Ashley, we soaked the jacket realistically from top to bottom. The shoulders carrying the majority of the water. The speckled water effect helps make for a more interesting shot. These photos were eventually used in social media and the product page. When posted on Instagram, it's rare that your audience will linger on an image for an extended time. Getting the point across quickly will help them understand the product quickly as they scroll. 

Learning how to shoot photos on white took years of trial and error. Once you figure it out, you will have a mental checklist so you can get it right everytime. Once set up is understood, you can get on with making the most of the shoot creatively.